blynk
Environment
- ESP32 DevKit C
- Macbook Pro
- iphone
- Wifi
Install blynk and blink it
- Download Blynk App
- Sign up
- Confirm email address and get credential
- Create new project
- choose “ESP32 Dev Board”
- Install blynk library
- for Arduino IDE, install it at Tools > Manage libraries :
Blynk by Volodymyr Shumanskyy Version 1.0.0-beta.3 - Go to Blynk code builder
- Choose hardware: choose “ESP32 Dev Board”
- Choose connectivity type: “Wifi”
- Add auth token (received by email)
- Copy
/examples/Boards_WiFi/ESP32_WiFi/ESP32_WiFi.ino - Paste code to Arduino IDE
- Set Auth token, SSID, password
- Flash and play
- Upload sketch to ESP32
- On serial monitor, you will see
 1
 2
 3
 4
 5
 6
 7
 8
 9
10
11
12
[33] Connecting to HM-G24
[615] Connected to WiFi
[615] IP: 192.168.0.17
[615]
    ___  __          __
  / _ )/ /_ _____  / /__
  / _  / / // / _ \/  '_/
/____/_/\_, /_//_/_/\_\
        /___/ v1.0.0-beta.3 on ESP32

[692] Connecting to blynk-cloud.com:80
[1418] Ready (ping: 409ms).
- for Arduino IDE, install it at Tools > Manage libraries :
-
Connect hardware Pinmap
ESP32 devices 25 Resister470Ω - LED(a) GND LED(c) -
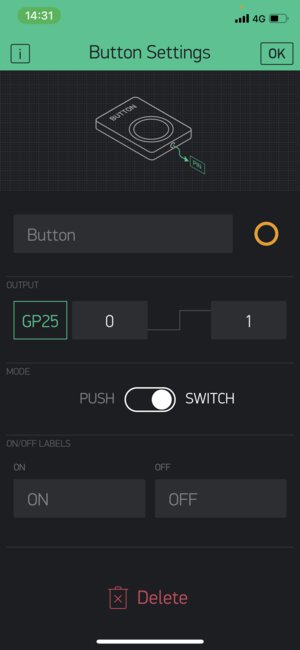
Configure app
- Add button
- Assign hardware Pin : GP25
- value : 0 - 1
Then it worked !
Ref.
Consideration to use Brynk
Timer
delay() in loop() should NOT be used as this blocks Brink.run() that keeps Board connection to cloud. Instead, using BlynkTimer like below works.
1 2 3 4 5 6 7 8 9 10 11 12 13 14 15 16 17 18 | |
Virtual pins
Virtual pins allow you to interface with any sensor, any library, any actuator.
To read the data from app,
1 2 3 4 | |
- Virtual pins have no physical properties.
- Don’t place Blynk.virtualWrite(V5) inside void loop()
Display sensor data in Blynk app
Error
This did NOT work for analogRead() on ESP32 dev module (2021.05.08)
There are two major ways of displaying sensor data in the app:
-
PULL. In this case, Blynk app will request the data only when the app is open;
-
PUSH. In this case your hardware will be constantly sending data to the Blynk Cloud. And when you open the app, it will be there waiting;
PULL
PULL sensor data when Blynk app is running over Virtual Pins.
Installation
In Blynk app:
- Create a New Project (new Auth Token will be sent to your email);
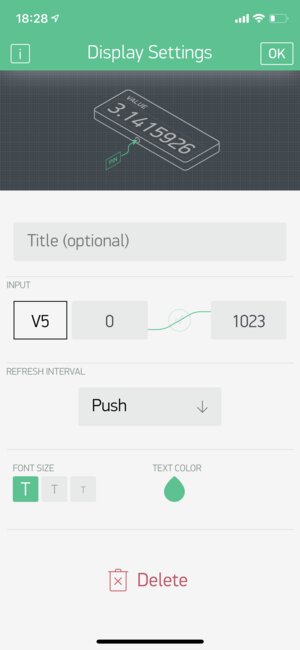
- Add Value Display Widget;
- Go to Widget Settings ;
- Set PIN to Virtual Pin V5;
- Set Frequency to 2 seconds;

Preparing code:
- Open this example sketch. Changed machine to ESP32
- Insert your Auth Token(received by email), Wifi SSID and password in the sketch;
- ⚡️ Flash the code to your hardware;
- In the Blynk app - press Play button;
- You should see the data coming;
Source code
1 2 3 4 5 6 7 8 9 10 11 12 13 14 15 16 17 18 19 20 21 22 23 24 25 26 27 28 29 30 31 32 33 34 35 36 37 38 39 40 41 42 43 44 45 46 | |
Pinmap
| ESP32 | devices |
|---|---|
| 4 | Potentiometer datapin |
| 5V | Potentiometer VCC |
| GND | Potentiometer GND |
Outcome
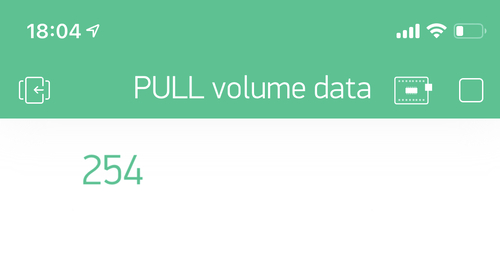
At this point, I only could retrieve static data (max value) even I waited over 2 - 15 minutes
PUSH
PUSH. Send sensor data from hardware in intervals over Virtual Pins
consideration
- VERY IMPORTANT: You can’t send sensor data in your void loop()
- because calling it in loop() cause flood of data
- when Blynk Cloud notices that, it automatically ✂︎ cuts your connection.
- using BlinkTimer instead.
Installation
In Blynk app:
- Create a New Project (new Auth Token will be sent to your email)
- Add Value Display Widget
- Go to Widget Settings
- Set PIN to V5
- Set Frequency to PUSH
Preparing code:
- Open this example sketch.
- Check your email inbox for Auth Token; Insert your Auth Token(received by email), Wifi SSID and password in the sketch;
- ⚡️ Flash the code to your hardware;
- In the Blynk app - press Play button;
- You should see the data coming;
Source code
1 2 3 4 5 6 7 8 9 10 11 12 13 14 15 16 17 18 19 20 21 22 23 24 25 26 27 28 29 30 31 32 33 34 35 36 37 38 39 40 41 42 43 44 45 46 47 48 49 50 51 52 53 54 55 56 57 58 59 60 | |
Pinmap
same as “PULL” case
outcome
I only could retrieve static data (max value - 4095) (same as “PULL” case)
Even I tried follows, it did not work for analogRead()
- define A10 (set ADC Pin)
- tried to use the other pin : GPIO27
- make
sensorDataparameter as local variable
When keeping Blynk.virtualWrite(V5, millis() / 1000); in myTimerEvent, it sends changing value to Blynk app.
It looks a few people faces same thing